inventory
TouchOSC
Manufacturer Website Link: https://hexler.net/touchosc
Serial No(s):
Quick Start Guide
TouchOSC is tool for building custom MIDI interfaces. It is available for all platforms. It is very powerful, but there’s quite a learning curve - you should consider this for a musician who is regularly using an iPad but the software they tend to use isn’t meeting their needs
Licenses cost £10-£15 on mobile devices, but the desktop software is free for personal use or evaluation.
We’re going to cover quickly building a (very) simple interface from the windows software.
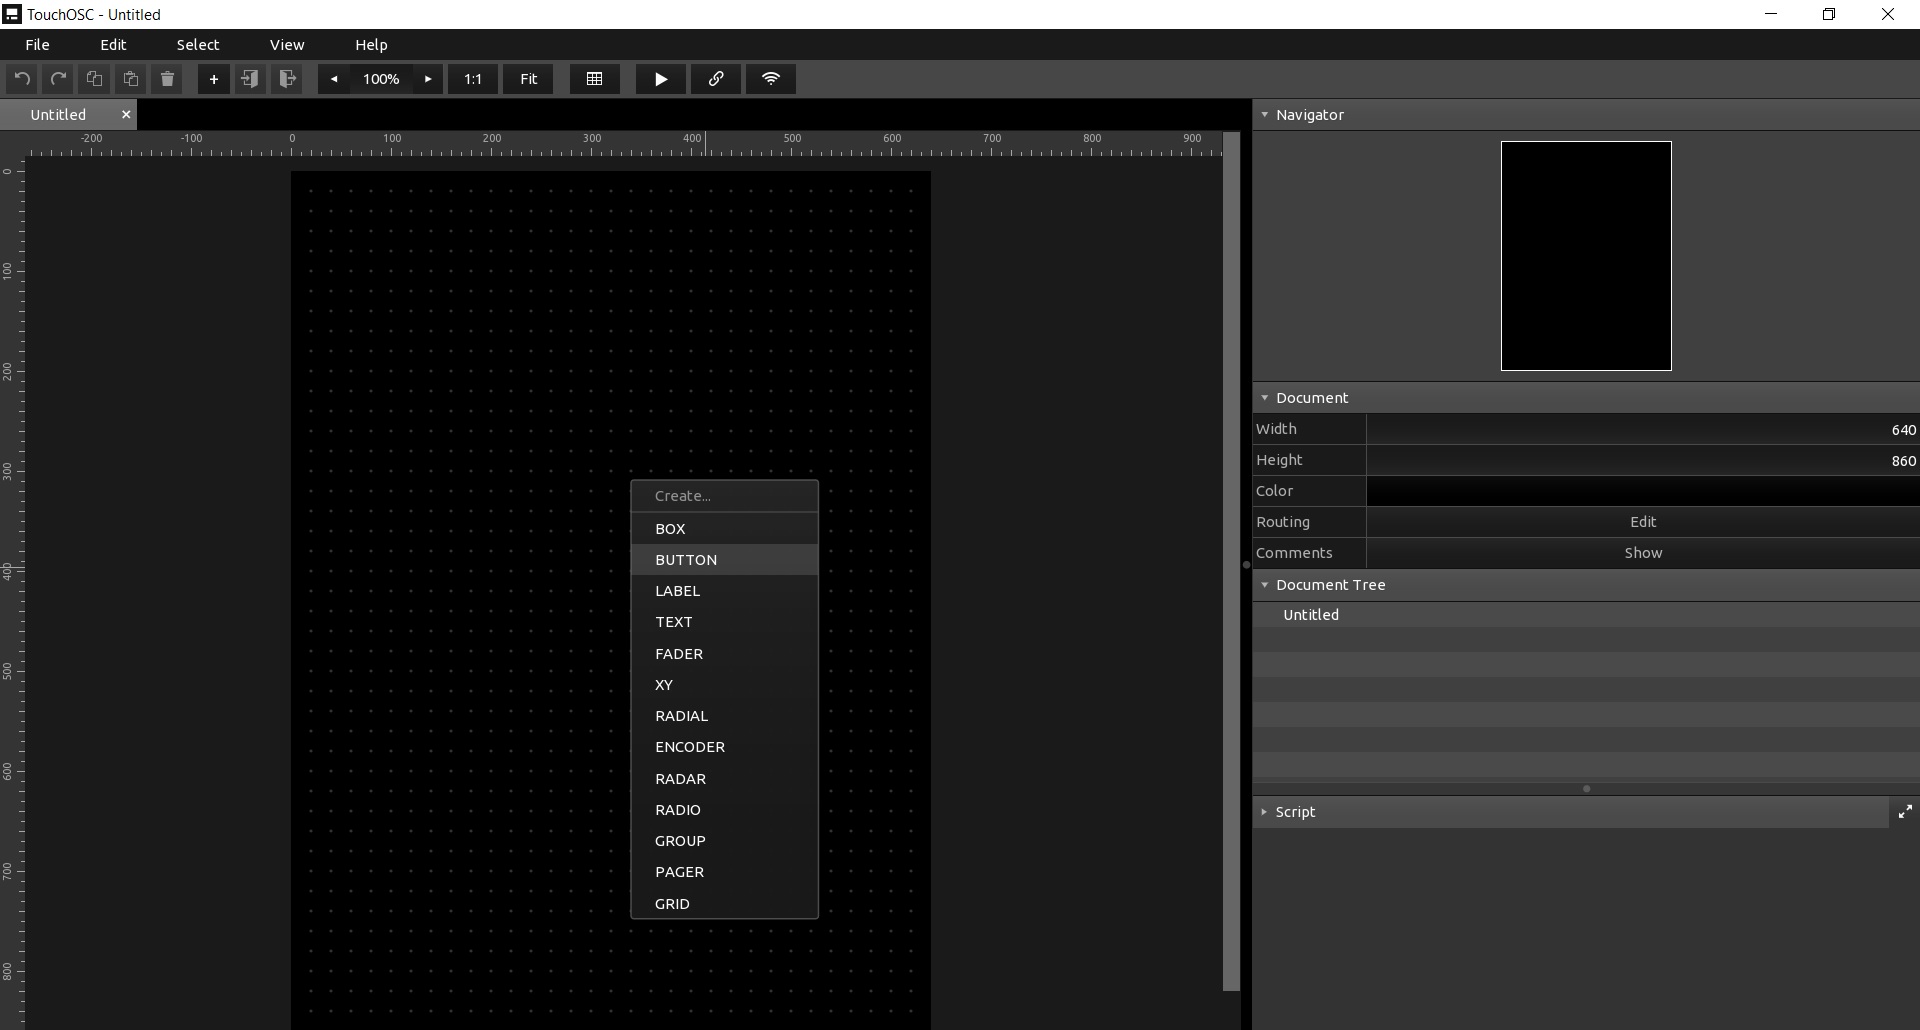
Open the software. You’ll have a large gridded area on the left - right click here and select BUTTON:
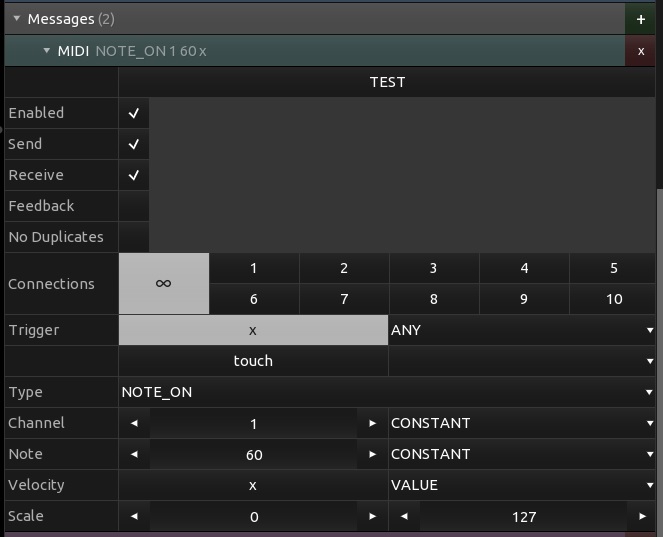
This will create a button - it can be resized by dragging the corners or edges. We simply want this button to send a MIDI note on when it is pressed, for MIDI note 60 (C4).
Select the button and scroll down until you see the “Messages” section. Below this are messages that will be sent when the button is pressed. Select the MIDI message.
In here, select the type (which should be CONTROLCHANGE) and change it to NOTE_ON.
Then find the “Note” line. Change the INDEX to CONSTANT, and then set the Note value to 60.
Now we just need to ensure the notes are sent to our desired output. Selecting “Edit” on the top bar, then Preferences will open the preferences menu.
Find the MIDI section and confirm your desired output is present and selected.
Then, we also need to ensure your output is “connected”. There is a ► icon on the top bar, with a connections/link icon next to it. Select the link icon and ensure your desired output is selected in the “Send Port” box for Connection 1, and Connection 1 is enabled.
Finally, you can select the ► and test your interface.
If you are just building a simple note interface, you can repeat the steps above, changing the colour and shape of the note buttons as required.
Troubleshooting
Having other issues? ask a question